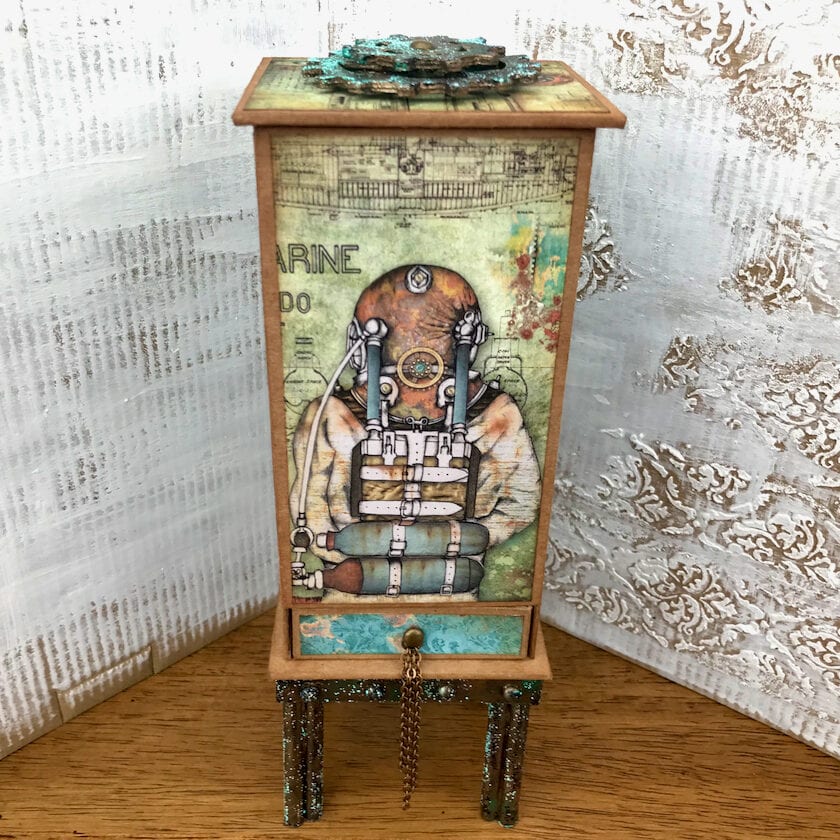
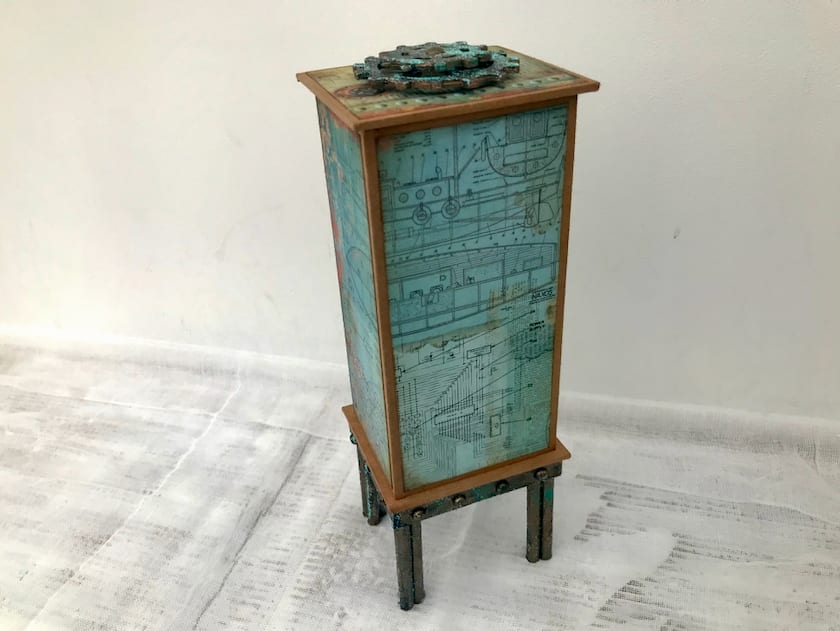
I made a lens wipe dispenser using Stamperia’s 8×8 Mechanical Sea World design paper.
I took some pictures of how to make it, but I had only the general idea and thought about the details while making it. As usual, there was a lack of advance planning! ?
スタンペリアの8×8デザインペーパー( Mechanical Sea World )を使ってレンズクリーナー用の収納ボックスを作りました。
一応作り方の経過を写真に撮りましたが、大体の形だけ決めて細かいところは作りながら考えました。計画性に欠ける性格。?
The Making of a Lens Wipe Dispenser
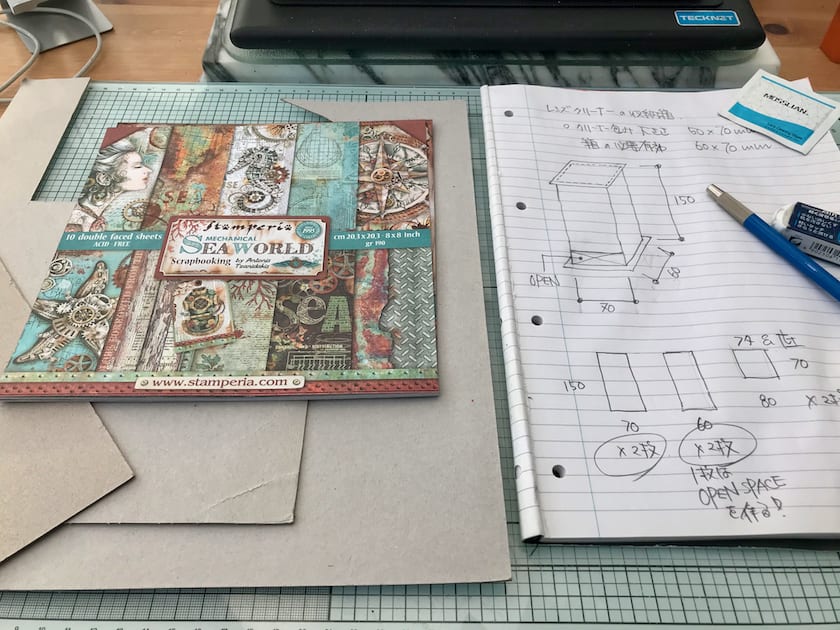
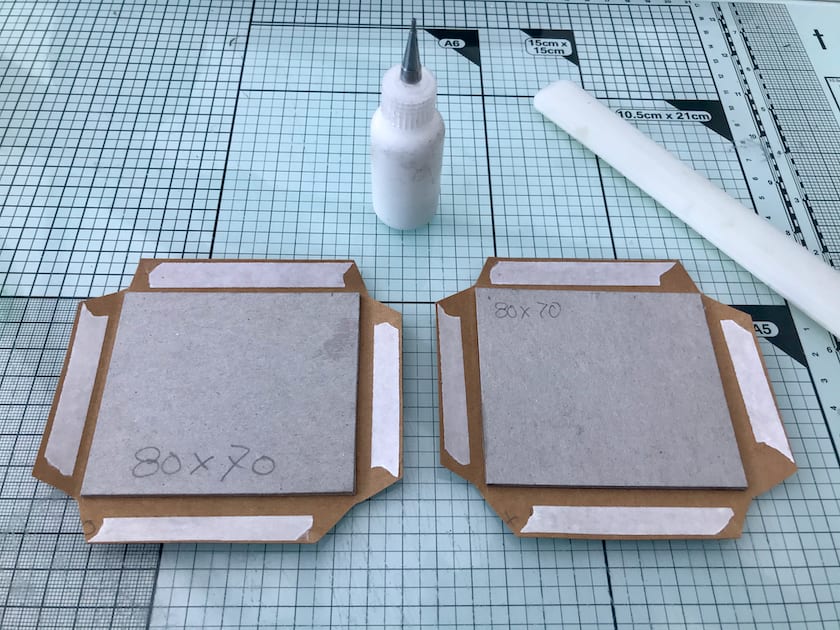
The size of the lens cleaner is 60x50mm, so I set the size of the main body to 70x60mm. The height was decided by the size of the image (the diver) I wanted to use. It is a simple structure with a top-opening lid to fill up the wipes and a lower drawer to dispense them.
中に入れたいレンズクリーナーのサイズが60x50mmなので本体の大きさは70x60mmに設定。高さは使いたいイメージ(潜水人)の大きさから感覚で決めました。上の蓋を開けて下の開口からクリーナーを取り出すシンプルな構造です。
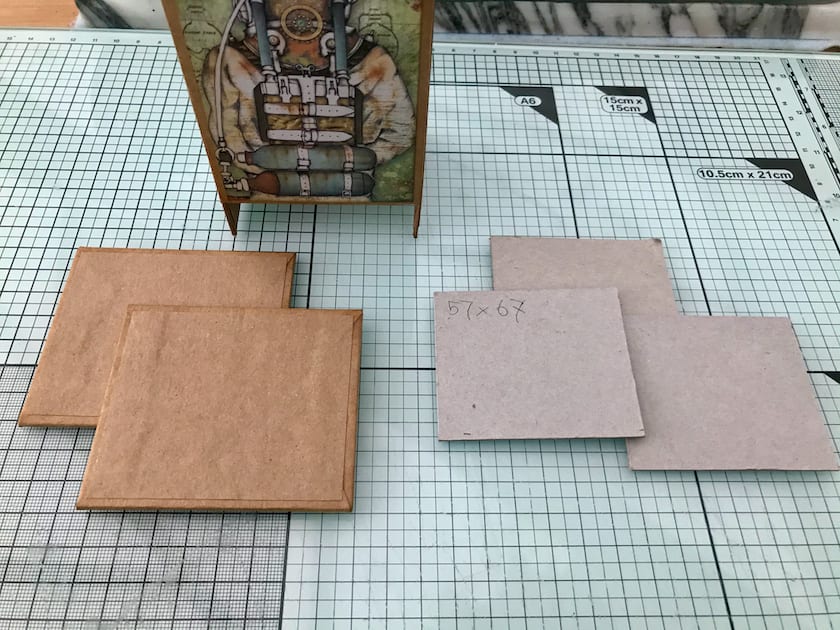
For the main structure of the box, I used 1mm greyboard and kraft paper (A4 kraft paper 100gsm).
箱のベースは1mmのグレーボードとクラフト紙(A4クラフト紙100gsm)を使いました。
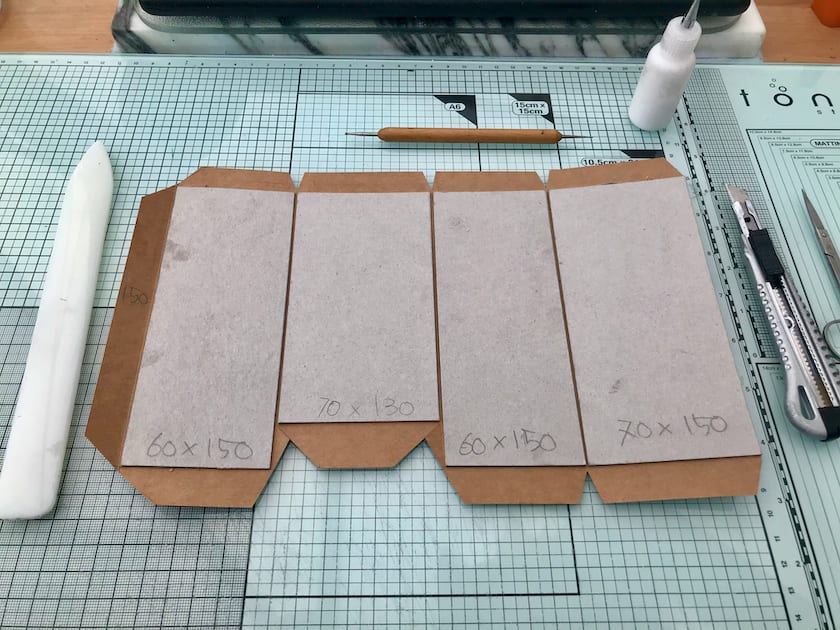
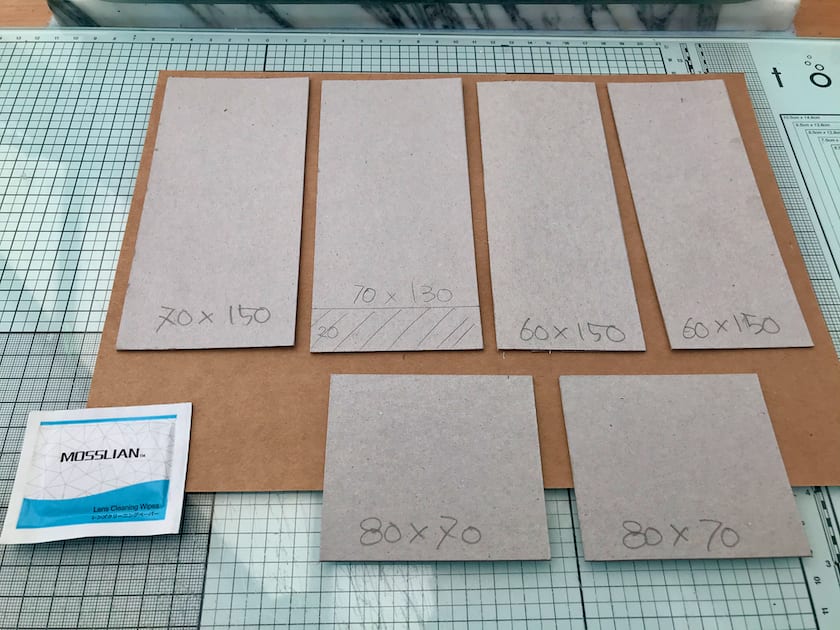
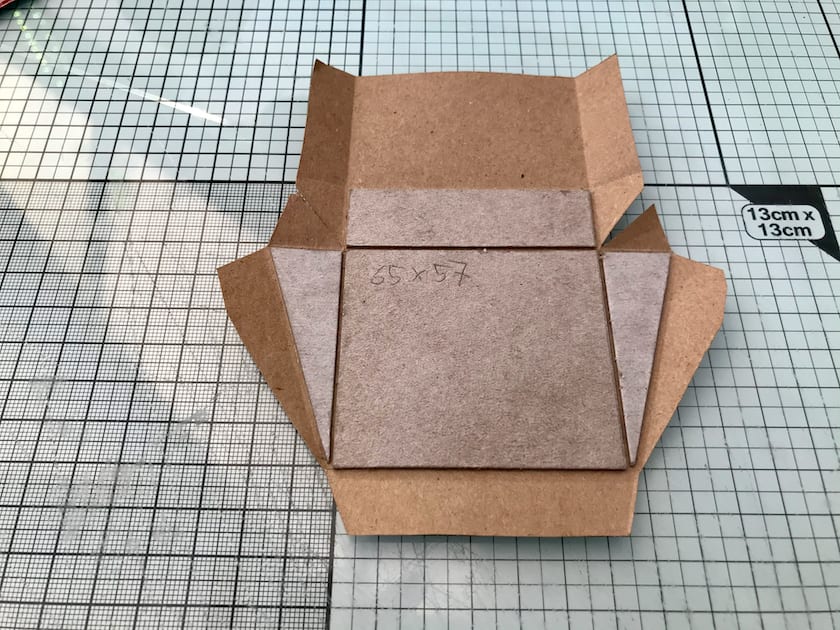
First, I made the sides of the box. This size fits a sing sheet of A4. Place the grey-board on kraft paper and glue. Leave a small gap of about 1 mm between them. (Grey-board thickness + α) Cut the corner diagonally, leaving about 2 mm at the corner. Make the crease around them with the stylus. (So that it can be folded cleanly later)
まず側面から作ります。この大きさだとA4サイで収まります。グレーボードをクラフト紙に並べて糊で貼り付けます。面と面の間は1mmと少し隙間を開けます。(グレーボードの厚み+α)コーナーは2mm程残して斜めにカットします。スタイラスで折り目に線を入れます。(後で綺麗に折れるように)
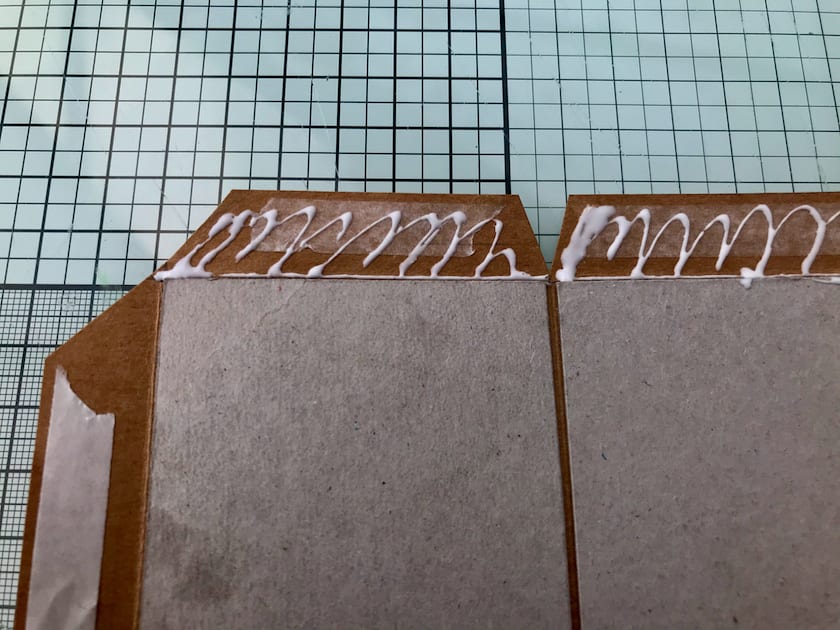
Double-sided tape and glue are used together. Glue firmly to the edge.
貼り付けは両面テープと糊を併用。小口部分にはしっかり糊をつけます。

Use a stylus to fold the remaining 2mm on the corner, so that the grey card does not show.
コーナーの2mm程残した部分をスタイラスなどを使って角が出ないように折り包みます。
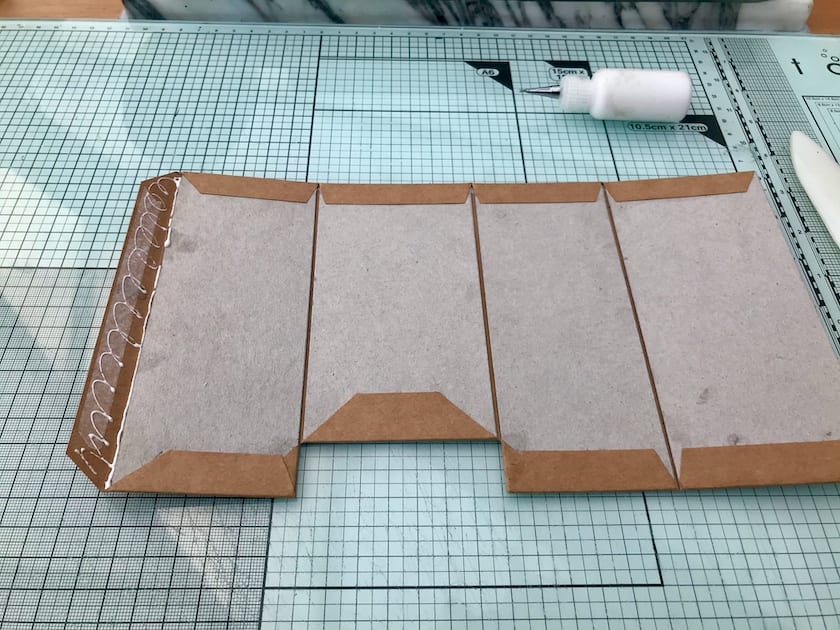
Use the tab on the left to glue the structure and form the body.
左のタブで四角に結合します。
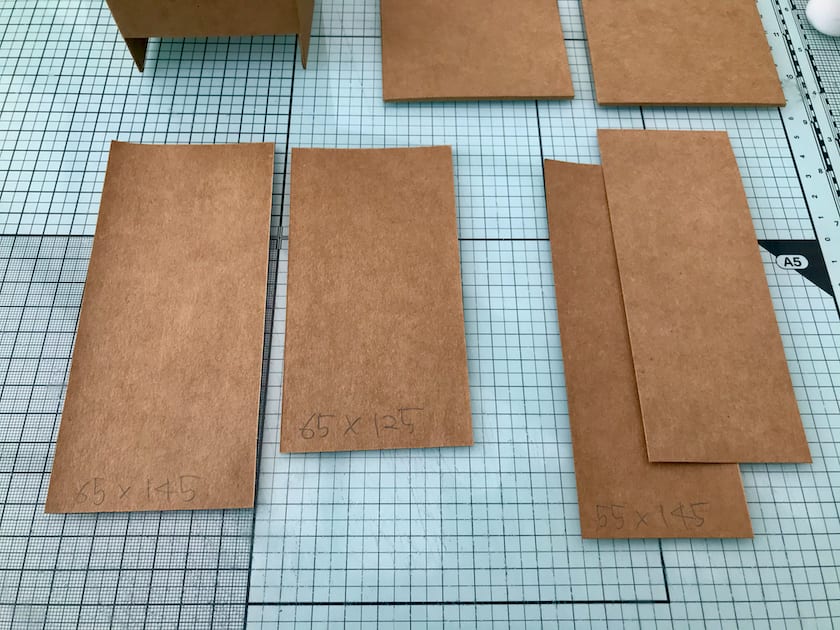
I felt the one sheet of cardboard was a bit flimsy for the lid and the base, so I decided to stack two sheets.
The double-fold bias tape for the corners is cut to the height of the box and tapered.
蓋、底は一枚だと少し頼りなかったので2枚重ねにすることに。
コーナ用の二つ折りテープは箱の高さでカットしテーパーをつけます。
Where the corner tape was glued.
コーナー用のテープを貼った所
Wrap the lid and bottom in the same way with kraft paper.
蓋と底も同じようにクラフト紙で包みます。
The Walls, Lid and Base
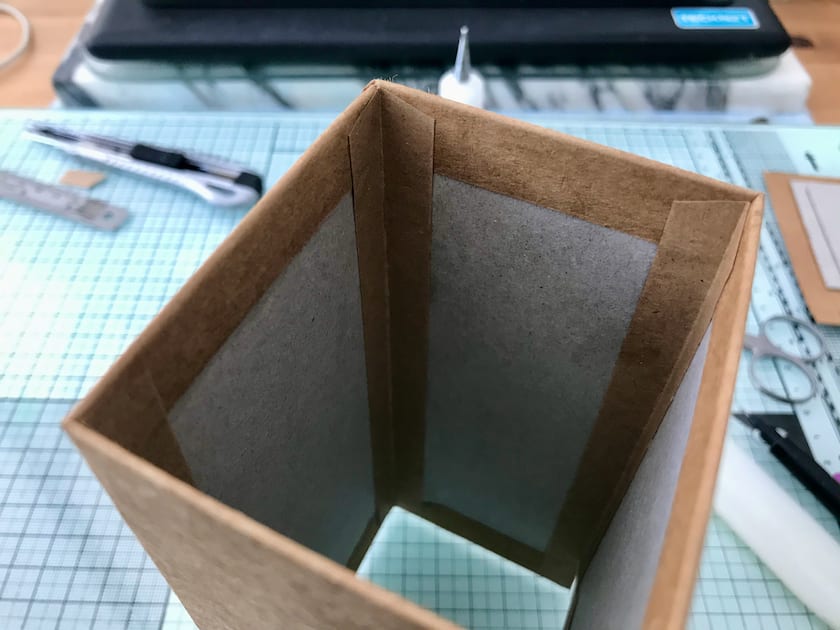
For the inner walls, I cut the brown paper 5 mm smaller than the box.
箱の内側側面に貼るクラフト紙。箱より5ミリ小さくしました。
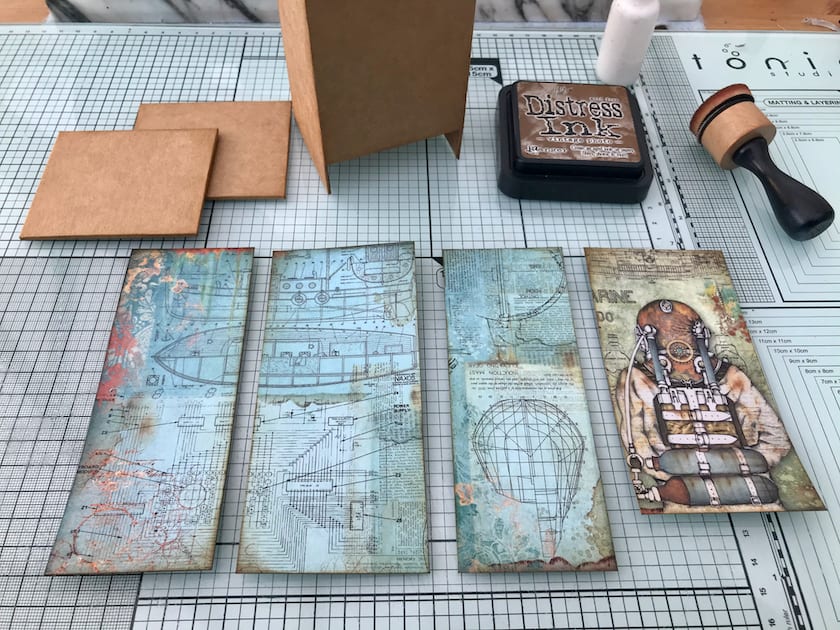
The edge of design paper and box is Antique processing with Distress Ink.
デザインペーパーと箱にDistress Inkでアンティーク加工。
Stick kraft paper on the lid and bottom to hide the grey board.
蓋と底にもグレーボードを隠すクラフト紙を貼ります。
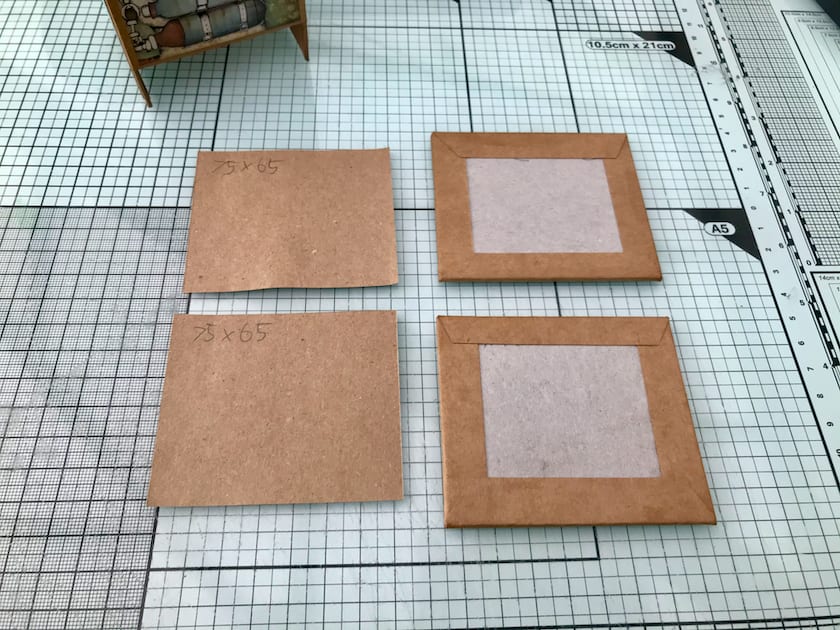
At first, I was thinking of attaching the lid with a hinge, but since the box itself is small, I changed the plan and decided to use a chamfered edge instead.
当初は蓋をヒンジで付けようと考えていましたが箱自体が小さいので計画変更、凹凸での開閉にしました。
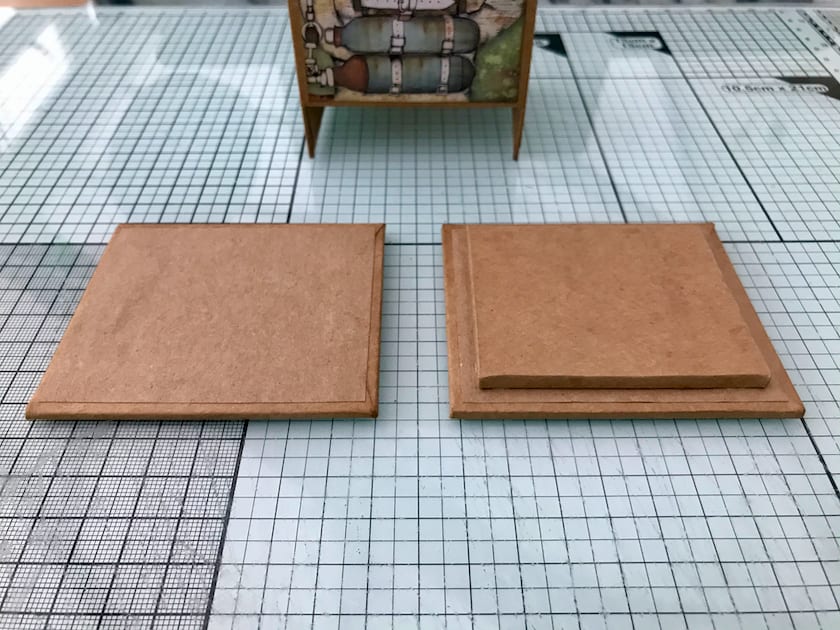
The base and the lid. The lid (on the right) has a chamfered edge that is smaller than the inner dimensions of the box.
底と蓋 右側の蓋にも箱より小さいサイズで凸をつけました。
I originally intended to leave an opening to retrieve the wipes. However, I changed my mind and decided to make a drawer instead because I didn’t want to see the wipes inside. The side is fitted and made into a hypotenuse.
下の取り出し口は開口のつもりでしたが中のクリーナーが見えるので引き出しに変更。側面は収まり上、斜辺にしました。
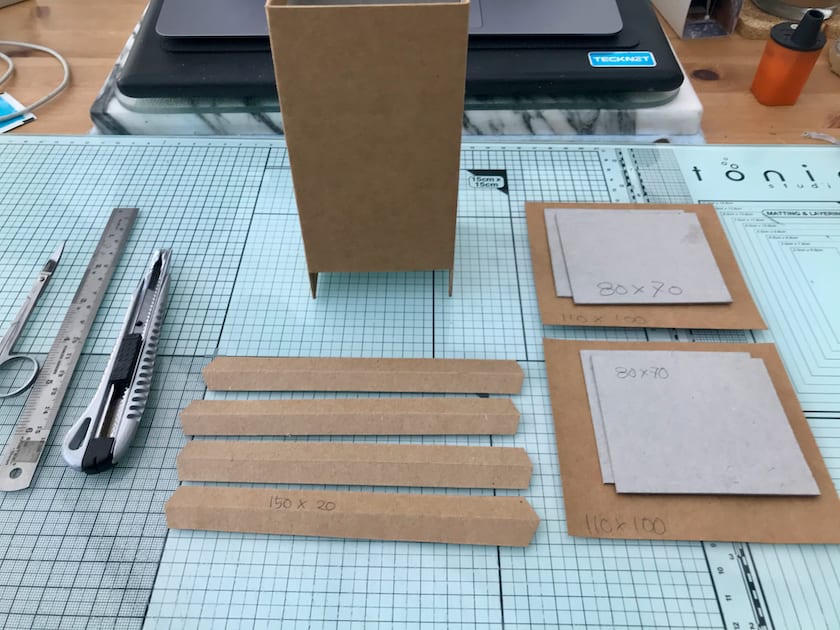
I decided to add longer legs than I originally planned. The legs were made from 3 paper straws stacked together.
当初考えていたより高い足を付ける事にしました。足は紙ストロー3本をまとめて作りました。
Final Decoration of the Lens Wipe Dispenser
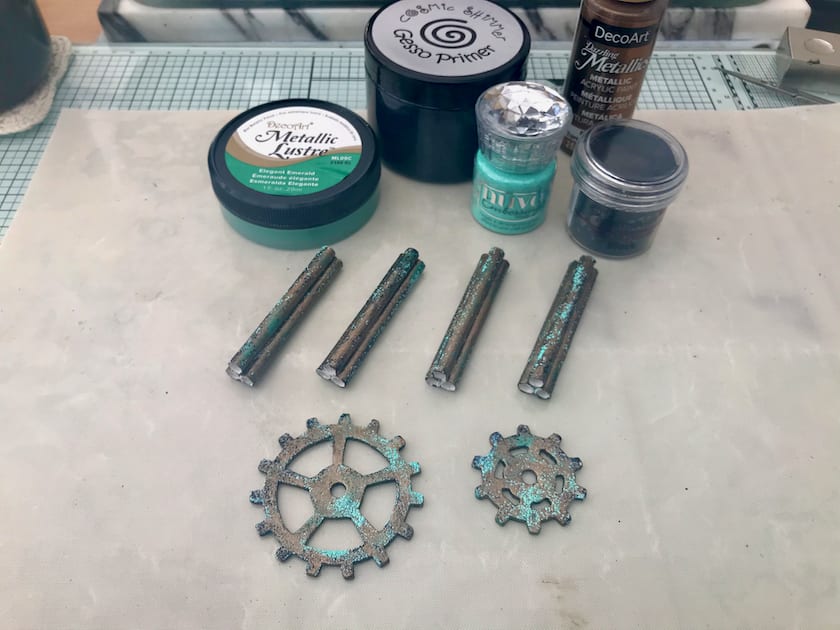
Ornaments for the legs and lid. Painted with metallic bronze after grounding with black gesso. Then I applied turquoise and black embossed powder.
脚と蓋用の飾り。ブラックジェッソで下地後メタリックブロンズで塗装。その後ターコイズと黒のエンボスパウダーをかけました。
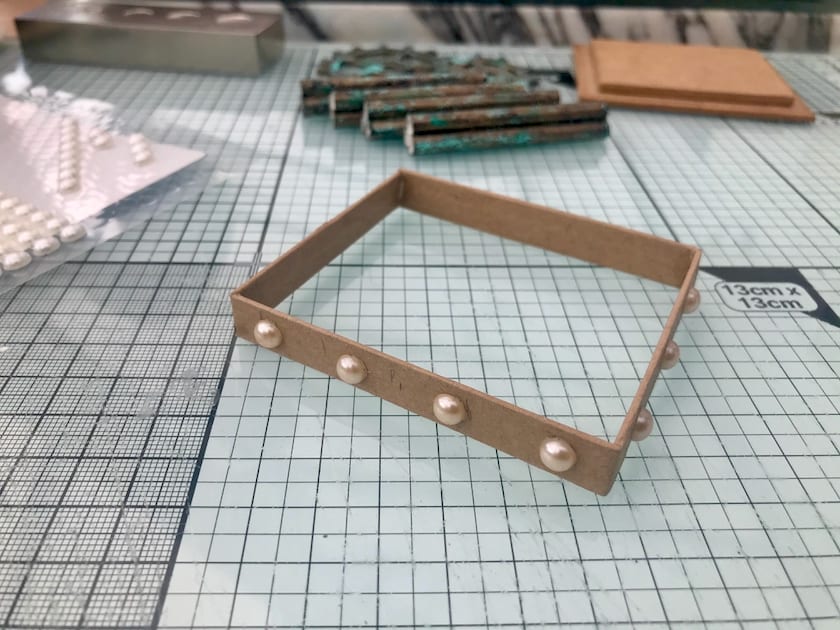
I decided to make a pedestal to attach the legs. I painted this as well as the legs. Initially, I had a lot of trouble attaching the legs. I tried using silicone glue and hot glue, but it didn’t work, and I was worried about the strength, so I finally went with extra heavy gel mediums.
脚を取り付けるために台座を作る事にしました。こちらも脚と同じように塗装しました。足の取り付けにはかなり苦労しました。シリコングルーやホットガングルーを使ってみましたが上手くつかなかったり強度が心配だったので最終的には Extra heavy gel mediums を使用しました。
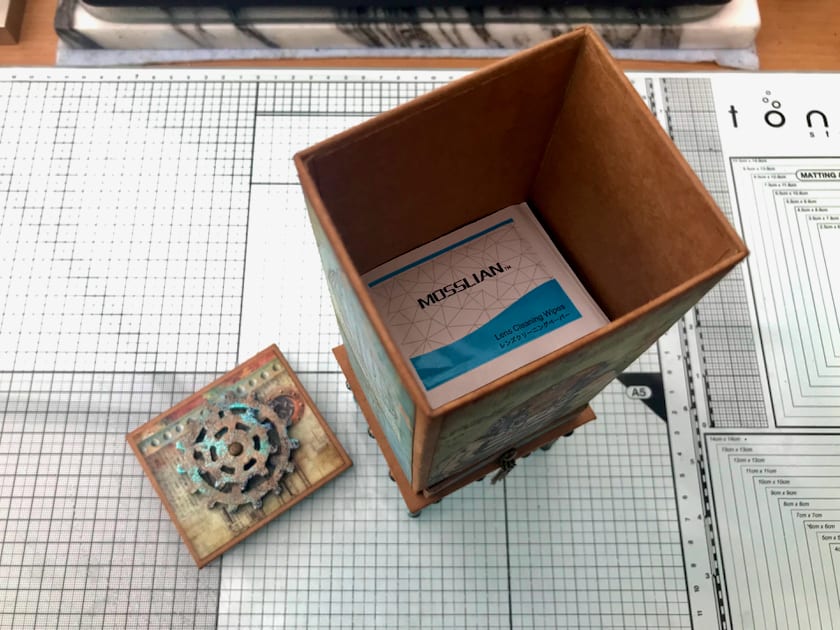
I added the wipes. The size looks good!
クリーナーを入れてみました。サイズも良さそうです。
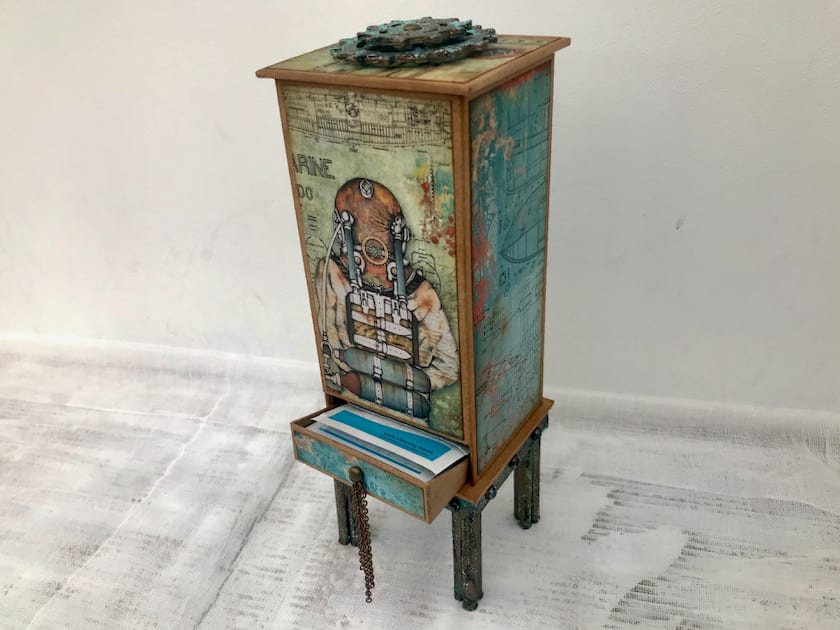
Front drawer
前面 引き出し
Reverse side
I always make it until the end without deciding the details, so it is random and there are many redoes. Still, it’s fun to notice and change or devise while making.
裏側
いつも最後まで詳細を決めず作るので行き当たりばったりでやり直しも多いです。それでも作りながら気がついて変更したり工夫していく経過は楽しいですね。
Materials Used 使用品
Stamperia 8×8 Mechanical Sea World
Deco Art Americana Metallic Paint Rich Espresso
Golden Acryl Med 8 Oz X-Heavy Gel Matte
Thats really neat. Love it and going to share
Thanks! ❤️❤️❤️
Love it. You are so talented.
Thanks, Sue! You are so kind! x
That’s fabulous! Really love that paper too. I’ve added it to my wishlist! Birhtdy coming up next month :-D
Thanks, Kathryn! And Happy New Year! Hope things have settled down a bit before your birthday.
What a great idea, its always nice when something so gorgeous to look at also has a very practical use. I wouldn’t have known where to start so thank you for the step by step photos. Wishing you a Happy & Healthy New Year. Lets hope things soon start to improve! Hugs Emmax
Thanks, Emma! I’ve been trying to make a lot of practical things over the past few weeks. Unfortunately, haven’t had time to get online much, so there is a backlog of things to post! Wishing you and your family the best of things in 2021! x
No idea why I’m having trouble leaving comments on some blogs at the moment ;-( … 2nd attempt … love this super project Nozomi and the papers you’ve used … Happy New Year to you and yours &b keep crafting! Steph x
Hi Steph. Sorry to hear you’re having trouble commenting. My husband says if you go into settings on your browser and clear the cache, it might help. Wishing you and yours a wonderful 2021! (it has to be better than 2020, right?) x