What Is A Junk Journal?

Today I would like to show you one of my junk journals. To be honest, I’m not even sure what a real junk journal is!?
I use mine for keeping scraps from cards I have made. Sometimes, it might just be a sketch for an idea that came into my head. Or test runs to try out new craft products. Even prototypes of cards I later made.
今日は私のジャンクジャーナルの紹介です。(何が本当のジャンクジャーナルなのか正直なところわかりません?)
私のジャンクジャーナルは新しく購入したクラフト商品の試しやカードを作った時に出たスクラップ、思いつきのイラストやアイデアをキープしています。
Alpen Boxes Just Right For An A5 Junk Journal!
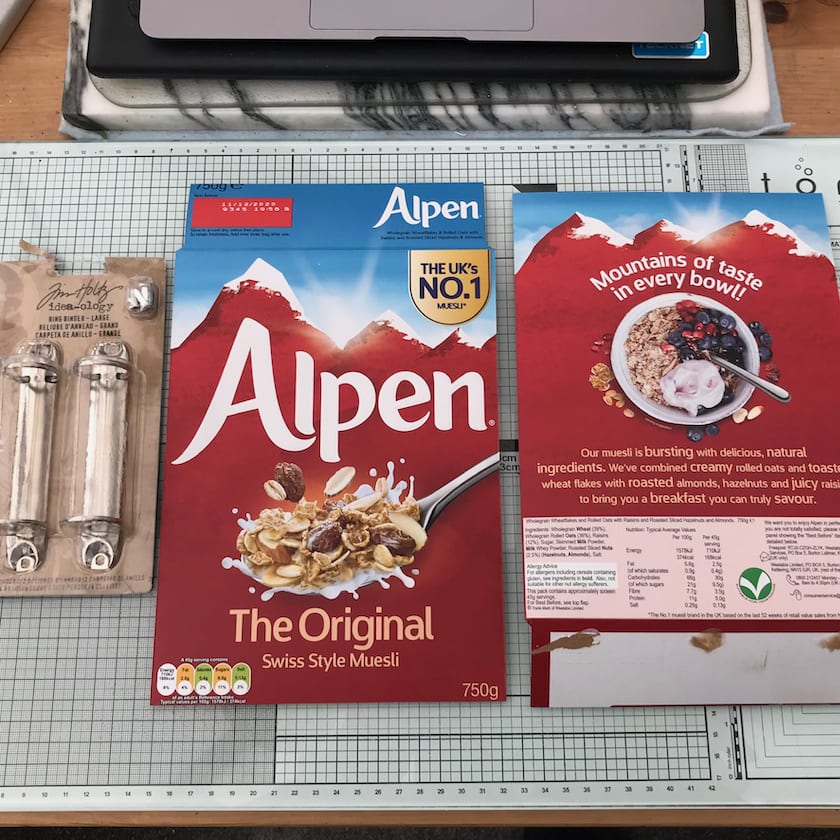
I made this using a cereal box as the base, using a ring binder. I like using the Alpen boxes because they are just the right size – perfect for A5. You don’t need to cut down the box at all.
シリアルの箱をベースにリングバインダーを取り付けます。このアルペンのシリアルボックスだとほぼそのままのサイズで箱の表と裏、蓋の部分は背表紙になり中にはA5サイズが納まります。
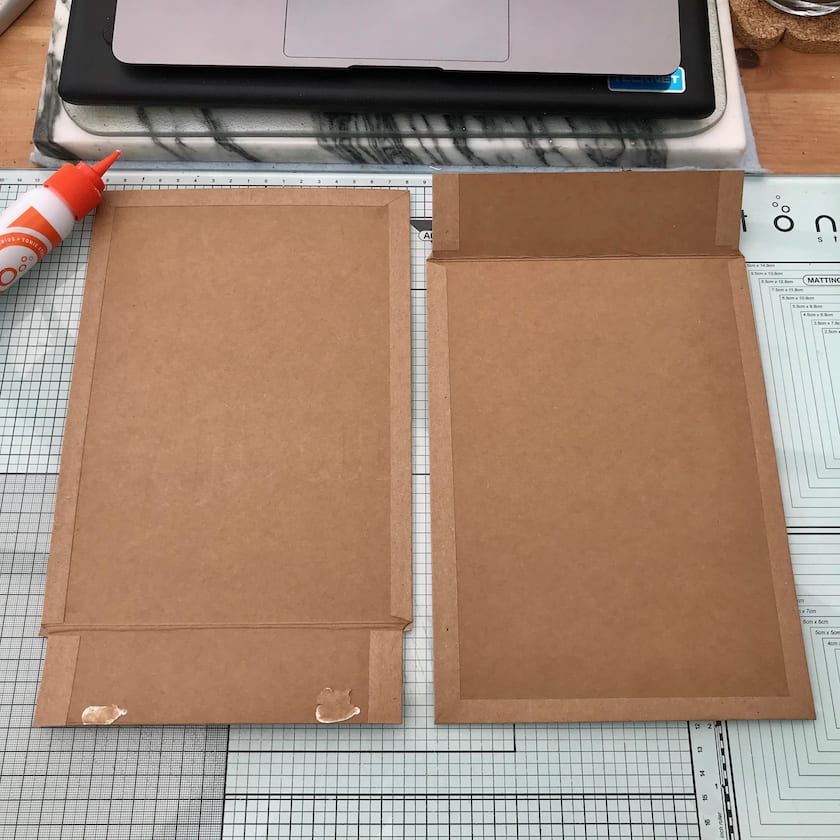
Wrapping With Craft Paper
Next, I stuck the craft paper to the front side (print side) of the cardboard leaving a margin of about 1cm. After that, I cut the corners at a 45-degree angle, leaving roughly 2mm of craft paper showing. Finally, I used double-sided tape and glue together before wrapping the craft paper around the back edge.
箱の周囲に約1センチほど余白をとったクラフト紙を表(印刷面)から貼ります。その後、角を2ミリほど残し45度にカットし全体を包みます。その際は両面テープとのりを併用します。
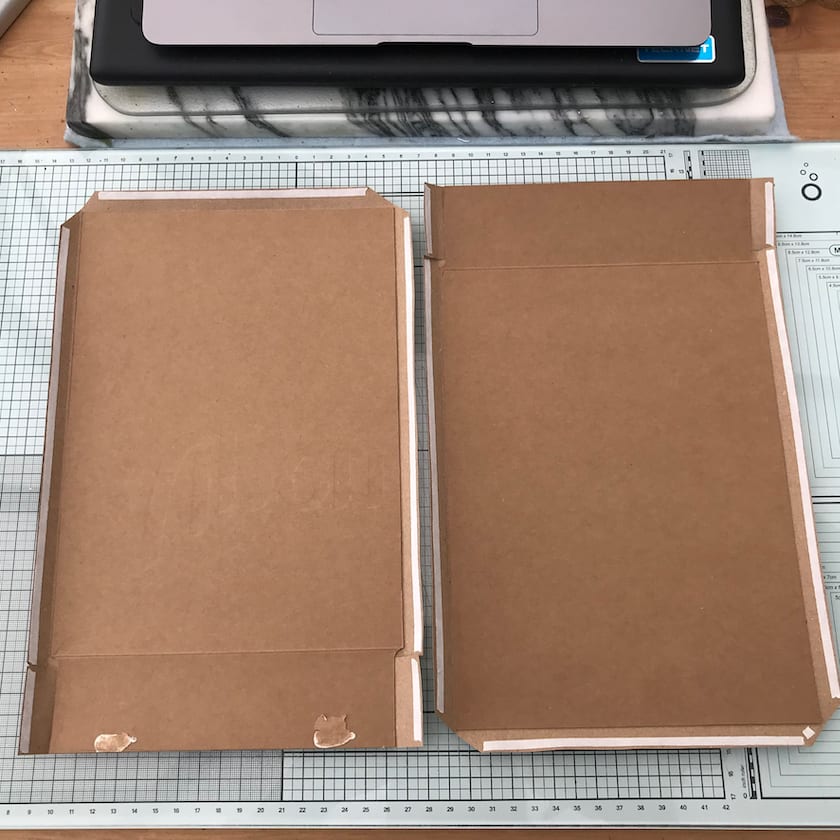
To Trim Or Not To Trim
You will notice that the lid and base are slightly narrower than the body of the box. I decided to leave it this way. However, if you want the cover to be the same width as the spine, you should trim box before wrapping. It will still be big enough for A5 if you do this.
包んで完了。私はほぼそのままの形で使ったので蓋と本体が少し大きさが違います。もし気になる場合は本体を蓋のサイズに合わせるてカットすれば包む際の面倒は減ります。その場合でもA5サイズは納まります。
Adding A Ring Binder
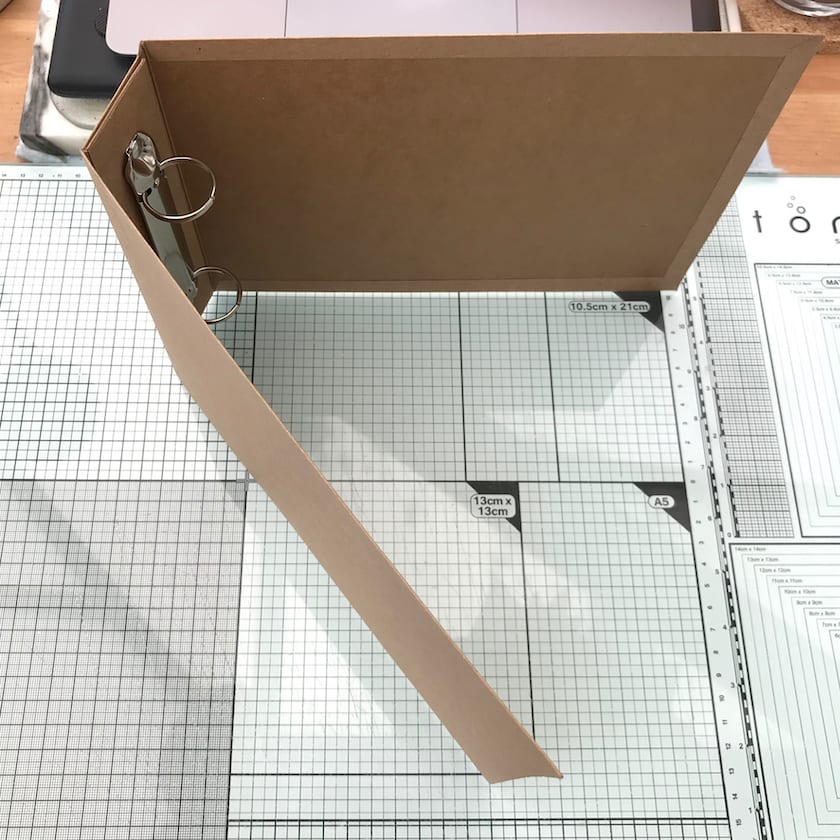
The next stage is to glue the spine together. However, I wanted cover the binder attachments and and the two edges of the spine where it had been glued. To do this, I cut another piece of card, slightly smaller than the inside of the spine and , once again, wrapped it with craft paper. After that, I attached the ring binder to this piece of card, which was, in turn, glued to the inside of the spine.
まず2つの背表紙をのり付けします。余っている箱を背表紙の大きさより若干小さくカットして、同じ様にクラフト紙で包んだ台紙を用意、リングバインダーを取り付けます。最後にそれを本体に接着します。
Junk Journal Complete
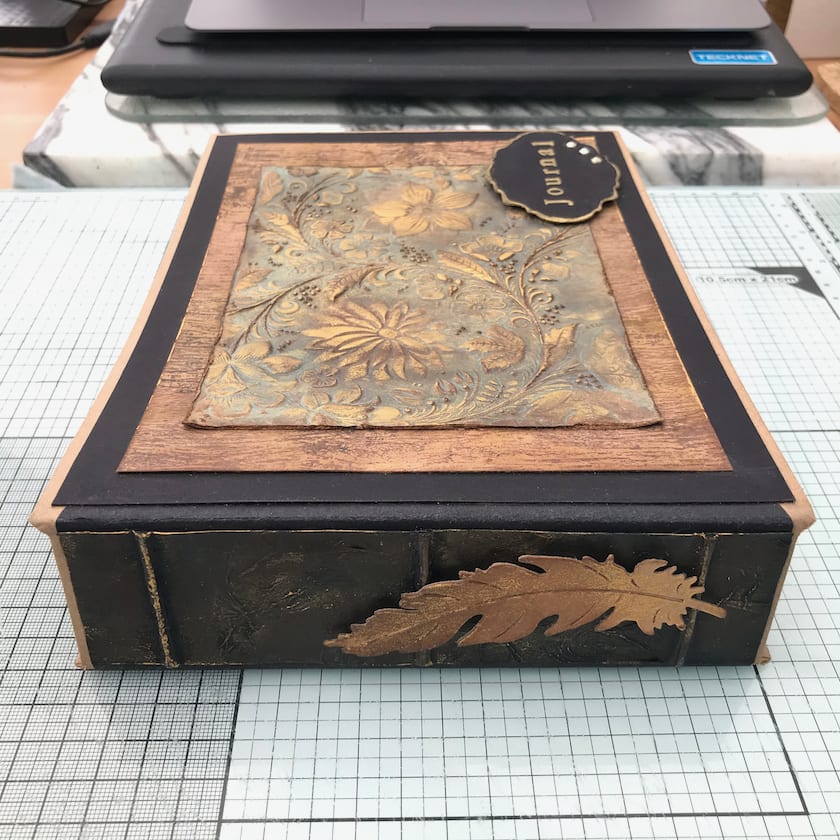
Now the main construction is finished, you can decorate it as you please. As you can see in the photo above, in this case I applied more layers which has the additional benefit of adding strength and rigidity. The large panel is Kraft paper with a wood grain stamp and using a Stayz On ink pad. For the upper layer, I used ink (Versa Magic) on the raised part of the embossing folder. After applying the ink, I did the embossing and then coloured further using Distress Ink and applied Inka Gold in various places. Gold embossing powder was used for the die cuts.
これでベースは完成、あとはお好きなように飾ってください。 上の写真からわかるように、私は何層か重ねています。装飾もありますがノリで貼ることで強度と剛性が高まります。表紙はクラフト紙に木目のスタンプをStayzOnで押しました。その上の層ははインク(バーサマジック)をエンボスフォルダーの凸部にのせてからエンボス加工して DistressInkで着色しインカゴールドを各所にのせました。ダイカットにはゴールドのエンボスパウダーを使用しています。
More Recycling
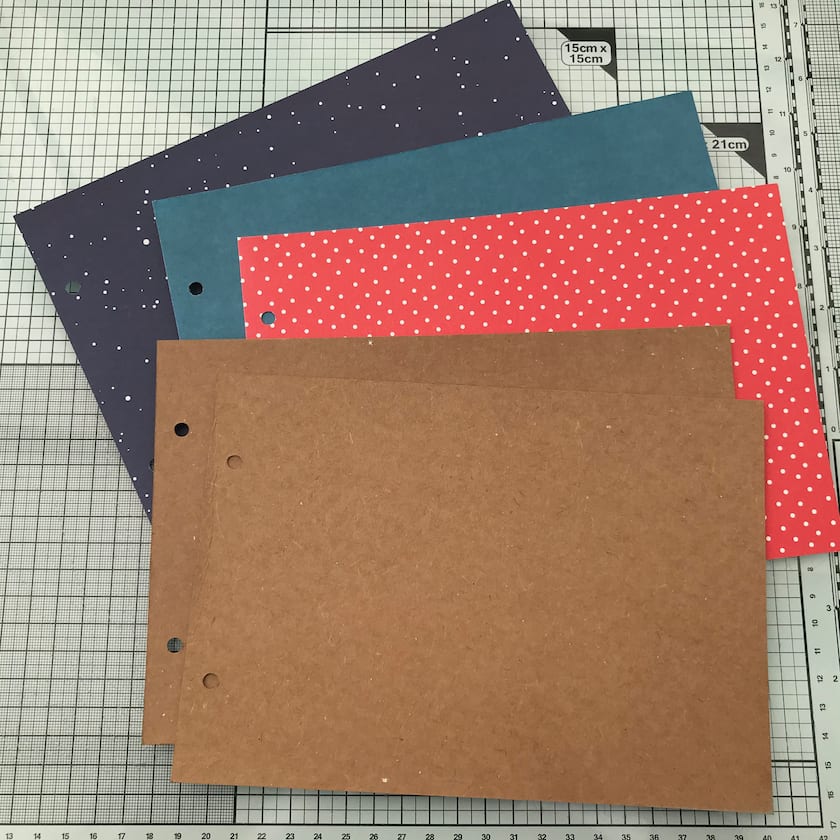
I used recycled boxes and greeting cards for the mounts that form the pages of the journal.
中の台紙も空箱やいただいたグリーティングカードを再利用しています。
Materials Used 使用品
Craft card for decoration: Docrafts A4 Kraftstax (Pack of 25)
Craft paper for wrapping the base: A4 Recycled Kraft Paper 100gsm 50 Sheets
Tsukineko StazOn Stamp Pad, Brown
Tsukineko Versamagic Chalk-Finish Ink Pad – Oasis Green
Docrafts 1 oz Embossing Powder, Black
Embossing Folder: Crafters Companion 3D Embossing Folders Country Garden
Stamps: Viva Decor Silicone Stamps Brick & Wood
Tonic Studios 1451E Layering Basic Dies-Eastern Oyster
Not so much a junk journal but a treasure trove of wonderful work! Some of your test runs/prototypes deserve to be made into actual projects but then I can see the benefit of having these ‘scraps’ in one place as a reminder of your creative process at the time. ? x (PS I can’t seem to post a comment using google keep getting an error message)
Aww, thanks Steph! You always say the loveliest things! Some of the bits and bobs will become a finished project at some point. Often, it’s simply testing how new products work with different materials and seeing what works best. Then, later, when I’m making something new, I remember the process that I tried out before. Not sure why the Google login isn’t working. Hubby is going to take a look at it. However, he also said that logging in the way you did is better for you because it links directly to your website, which is good for your Google ranking! x :-D
Love this. I still use my journal that you made for me whilst you were in Japan. Would be lost without it.
Thanks, Mum! I’m glad you still use it! x
looks amazing you can see all the effort and hard work you have put into this well done can’t wait to see more :)
Thank you so much for visiting my website, Alyce! x
Amazing work.The world needs to see this amazing talent x
Thank you so much, Anne! x
This is beautiful… such talent ❤️
Thank you, Debbie! x
It looks exquisite, artistic and unusual. Love it!
Aww, thank you Margarita! You are so kind! x
Wow incredibly beautiful artistic eye-catching and practical.Amazing talent
Thank you so much, Patricia!
Amazing, Nozomi you are a truly talented lady. absolutely beautiful.
Thanks so much, Tony!
I’ve started to make a travel journal abit like this but only got as far as making the cover so far. I hadn’t thought of usinga ring binder inside. That’s a great idea! Not sure when I’ll get the chance to finish the project but hopefully before too long!! Love yours, so many lovely surprises inside!
Thanks, Kathryn! You have a lot going on at the moment. I hope you can find time to do stuff!
Oooo that’s interesting what your hubby said about Google ranking, I really don’t know enough about that side of things! ?
Direct links to your blog are always better, apparently! x
Sooo amazing, thank you for the step by step, the outcome is the opposite of ‘junk’ Emmax
Thanks, Emma! x